Responsive image sizes in one batch call
Make a responsive image set in one batch request: one ref per width, per-size options, failed sizes kept apart and a srcset built from the results.
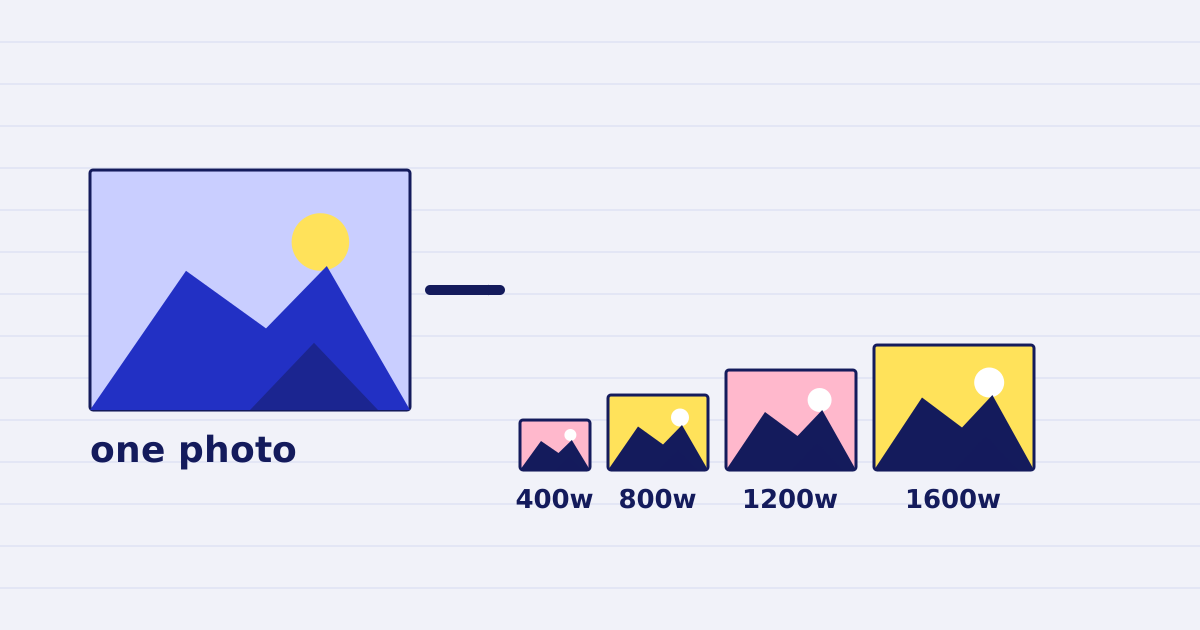
A responsive image is several copies of one photo. A phone gets the 400-pixel file, a laptop gets the 800-pixel one, and a large screen gets the sharp 1600-pixel file. The browser chooses from a srcset list, so each screen downloads only what it can show.
Making those copies one at a time is slow, and it is easy to lose track of which file is which. A batch request creates every width in one call. This guide shows the request, how to match each result to its size, the srcset markup you build from the results, and what the set costs.
The image batch endpoint takes a list of images, one shared options object and optional overrides for single images. Each result carries the ref you sent. For a responsive set, the ref is the photo id plus the width.
Pick the widths from the layout
Four widths cover most sites: 400, 800, 1200 and 1600 pixels. Measure the places where the photo appears, then drop any width that no screen will use. A photo shown only in a 600-pixel card does not need a 1600-pixel copy.
Do not ask for a width larger than the original. The resize guide explains why an enlarged image looks soft, and the API will make an enlarged file if you ask for one. Read the source width first, and skip every width above it.
One ref per size
Every item in images needs its own ref. A batch in which two items share a ref is refused with a 400 invalid_request, and so is a per_image_options key that matches no item. Build each ref from the photo id and the width, such as kitchen-800, so the ref says what the file is.
The shared options hold everything the sizes have in common. The entries in per_image_options change only the width:
curl https://api.justapi.tech/v1/image/batch \
  -H "Authorization: Bearer YOUR_API_KEY" \
  -H "Content-Type: application/json" \
  -d '{
    "images": [
      { "url": "https://files.example.com/photos/kitchen.jpg", "ref": "kitchen-400" },
      { "url": "https://files.example.com/photos/kitchen.jpg", "ref": "kitchen-800" },
      { "url": "https://files.example.com/photos/kitchen.jpg", "ref": "kitchen-1200" },
      { "url": "https://files.example.com/photos/kitchen.jpg", "ref": "kitchen-1600" }
    ],
    "options": { "fit": "inside", "format": "webp", "quality": 80 },
    "per_image_options": {
      "kitchen-400": { "width": 400 },
      "kitchen-800": { "width": 800 },
      "kitchen-1200": { "width": 1200 },
      "kitchen-1600": { "width": 1600 }
    }
  }'
With fit: inside and only a width, the height follows the photo. You do not need to know the shape of each picture in advance. That matters when one gallery mixes portrait and landscape shots, because a fixed height would crop or distort some of them.
This example has four items for one photo, which is a small batch. The same pattern works for a gallery: repeat the block for each photo, with refs that stay unique across the whole request. A batch takes up to 25 images on the free tier and up to 250 on the standard tier.
Why one batch and not a loop
A loop sends one request per size. That gives you one retry story per request, one billing line per request and four places where a timeout can leave you guessing. A batch gives you one job_id, one results array and one summary. If the response is lost, you read the job again instead of asking whether each file was made.
The trade-off is that a batch is answered as a whole. Up to 25 images come back in the same request. Larger batches, or any batch sent with "mode": "async", return 202 with a job_id, and you read the outcome from GET /v1/jobs/{job_id} or from a webhook.
Read the results by ref
The response has a results array. Each entry carries the ref you sent and a status of ok or failed. A successful size includes a signed url, expires_at, width, height, bytes and content_type. A failed size includes an error with a code and a message.
Match each result to your record by ref, not by its position in the array. The batch guide uses the same rule for any batch. Then build the srcset from the sizes that worked:
// results: the array from the batch response
const ok = results.filter((r) => r.status === 'ok');

const srcset = ok
  .sort((a, b) => a.width - b.width)
  .map((r) => `${r.url} ${r.width}w`)
  .join(', ');

const fallback = [...ok].sort((a, b) => b.width - a.width)[0]; // The largest size that worked.
Put the URLs in your markup. The sizes attribute tells the browser how wide the image is on the screen, in CSS pixels, so it can choose the right candidate from the list:
<img
  src="https://files.example.com/out/kitchen-800.webp"
  srcset="https://files.example.com/out/kitchen-400.webp 400w,
          https://files.example.com/out/kitchen-800.webp 800w,
          https://files.example.com/out/kitchen-1200.webp 1200w,
          https://files.example.com/out/kitchen-1600.webp 1600w"
  sizes="(max-width: 800px) 100vw, 800px"
  width="800"
  height="533"
  alt="Kitchen with an island and pendant lights"
  loading="lazy">
The src points at the middle size, and the width and height attributes come from that file's result. Setting them reserves the space before the image loads, so the page does not jump. The MDN reference for srcset and web.dev's article on responsive images explain how the browser picks a candidate. The MDN guide to responsive images covers the wider layout side.
Copy the files before they expire
The signed URLs expire. Each result shows expires_at, and results are kept for 24 hours on the standard tier and 1 hour on the free tier. A set you publish next week must live on storage you control. Copy every ok file there when the batch finishes, and write your own URLs into the srcset, not the API's links.
Handle partial failures
One failed size does not stop the others. If the 1600-pixel file fails, the set still has three sizes, and the browser uses the largest one that exists. Publish the sizes that succeeded, and keep the largest working size as the src.
If every size fails, the job ends as failed and nothing is charged. Check summary.succeeded before you replace the current images. A set with no files should never overwrite a set that works.
What a set costs
Each image that succeeds costs $0.0012 at the first tier, which covers images 1 to 1,000 in a calendar month. Images 1,001 to 10,000 cost $0.0010, and images above 10,000 cost $0.0008. The tiers are staggered, the same way tax brackets work. The 1,001st image is charged at the second-tier price, and the first 1,000 keep the first-tier price, so an extra call can never make the whole month cheaper.
Take a shop with 1,000 product photos and four sizes each. That is 4,000 images. The first 1,000 cost $1.20, and the next 3,000 cost $3.00 at the second tier. The total is $4.20 for the month's set. Failed sizes add nothing, because the batch charges only the items that succeeded. The pricing page has the full table, and the image optimization guide covers the price of a single file.
Checklist before you publish
- Every
refin the batch is unique. - Every width in
per_image_optionsis at or below the source width. - Results are matched by
ref, and thesrcsetuses onlyokentries. - Each file is copied to storage you control before its
expires_at. - The
alttext describes the photo, not the size.
Related guides
The image optimization reference lists every option, including fit, format, quality and max_bytes. The HEIC to JPEG guide explains why orientation has to be applied before any resize, and the resize guide covers the single-file version of this request.
Keep reading
-
Strip GPS location from photos with one API call
Phone photos store GPS coordinates in their EXIF block. Our image optimize call removes that block by default. Here is the request and a check for each output. -
Resize images for the web with an image API, step by step
Resize and convert images with one API call. Set width, fit, format and quality, use max_bytes for a size budget, and check the result before publishing.