HEIC to JPEG API: orientation and colour checks
A HEIC to JPEG API should do more than change the file extension. Your workflow also needs to apply orientation, choose useful dimensions and handle colour before removing metadata. Otherwise a smaller file can arrive sideways, look different, or carry pixels the destination never uses.
This guide follows the implemented JustAPI image service, with a request you can adapt for inspection photographs, product images or uploads from iPhones. The examples use synthetic URLs and proposed settings. They are not a guarantee that every input will reach the same byte size or colour fidelity.
Decide what the destination actually needs
Choose dimensions, format and quality for the place the image will be used. A product thumbnail, a photograph in an emailed report and an image prepared for print have different requirements. Begin with one destination and a small test set instead of treating the camera's original dimensions as the required output.
| Destination | First decision | What to inspect |
|---|---|---|
| Browser product gallery | Rendered image dimensions and format support | Sharpness at the actual display size |
| PDF photo report | Dimensions at the photo's page placement | Small labels, colour and downstream rendering |
| Evidence archive | Retention of the original and required metadata | Whether a delivery copy is suitable for the record |
| Mixed user uploads | Supported inputs and per-file failure handling | Unsupported files do not block valid ones |
JPEG is a reasonable starting point for photographs when compatibility matters. PNG may be appropriate when transparency must survive. WebP is an option for supported browser delivery. This is a decision about the asset, not a universal ranking of formats.
The public endpoint currently emits JPEG, WebP or PNG, with auto selecting among its supported behaviour. It accepts HEIC input but does not return HEIC. Do not assume that every encoder offered by an underlying library is exposed through an API. Explicit AVIF output is not accepted by this endpoint today.
Apply EXIF orientation before stripping metadata
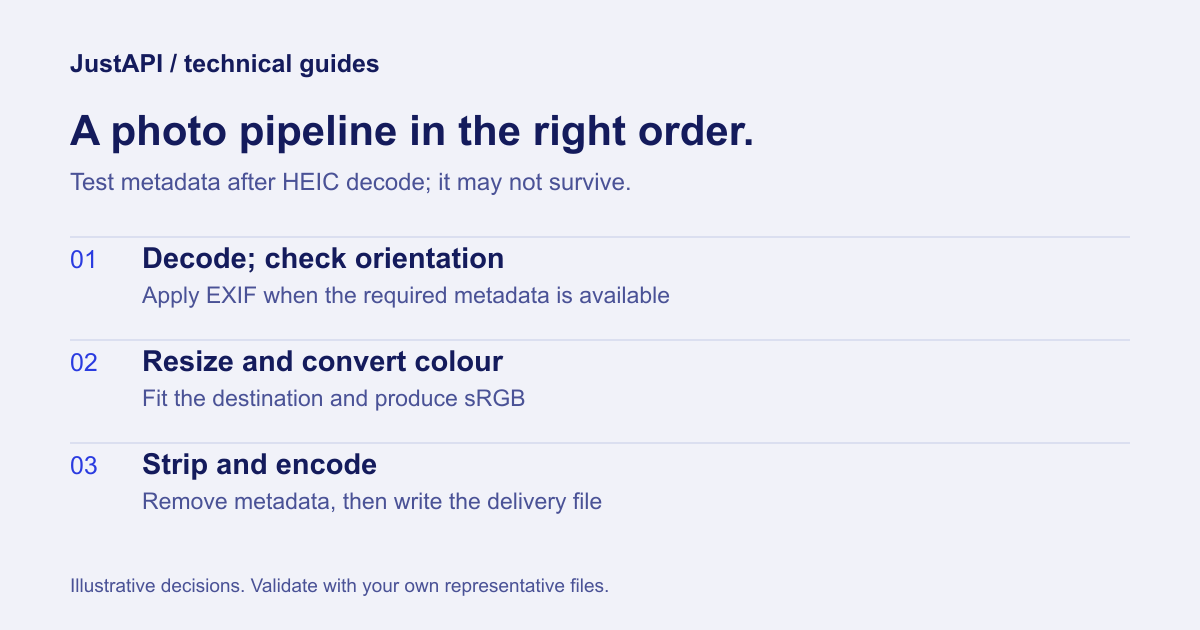
A photograph's pixel array and its intended viewing orientation can differ. Apply the orientation to the pixels before discarding its EXIF metadata. Once the orientation instruction is gone, another system may have no way to know that the pixels should be rotated or mirrored.
This is a documented operation in Sharp's auto-orientation reference. JustAPI enables auto-orientation by default. The service's image tests cover representative EXIF rotation and metadata removal; that does not eliminate the need to test files from your own upload sources.
Use both a portrait image and a landscape image in the test set. If the output dimensions swap after rotation, the resize step must work on that oriented result. Checking only that the output is a JPEG will miss this class of error.
Stripping metadata can reduce incidental information in a delivery copy, but it is not a full privacy review. A person's face, an address on a wall or a readable label remains in the pixels. Keep that distinction clear when a photograph is sensitive.
Convert colour rather than just deleting its profile
Convert the image into the destination colour space before removing its embedded profile. Deleting a profile is not the same operation as converting its pixel values. The workflow should interpret the source, produce sRGB output, and then decide which metadata the delivery copy should retain.
The Sharp stage of the current service converts to sRGB. Sharp's colour-space documentation describes that operation. It relies on the information available to that stage; it is not proof that metadata survived an earlier decode.
HEIC deserves a separate check. The current HEIC decoder creates an intermediate JPEG and does not explicitly carry the original EXIF or ICC profile into Sharp. The later orientation and colour operations therefore cannot be assumed to interpret every original HEIC correctly. Test your actual camera files, especially portrait and wide colour examples, before replacing an existing conversion workflow.
Check a saturated photograph alongside an ordinary scene. Use a colour-managed viewer for the comparison, and avoid judging a colour issue only from two different monitors. If matching a product's colour is commercially important, keep a separate colour acceptance process. A passing conversion test does not establish exact reproduction across every camera, display and browser.
Use an explicit HEIC conversion request
An explicit request makes the intended delivery policy visible: apply available orientation information, fit inside a width, remove metadata and return a baseline JPEG. The settings below are a starting point to test, not a recommended resolution for every report or website. The HEIC intermediate-file limitation above still applies.
Endpoint: POST https://api.justapi.tech/v1/image/optimize.
{
  "source": { "url": "https://files.example.com/photo.heic" },
  "options": {
    "width": 1600,
    "fit": "inside",
    "format": "jpeg",
    "quality": 76,
    "auto_orient": true,
    "strip_metadata": true,
    "progressive": false,
    "output": "url"
  }
}
Send the call from your server with authorization and an idempotency key, and replace the source with a retrievable image URL. Follow the quickstart for account access. The API key belongs in your backend or a private connector field, not in JavaScript downloaded by a visitor.
The returned result includes the output byte count, content type, width and height. Compare those fields with the image you downloaded. An image URL ending in .heic is not sufficient proof of the input format; the implementation inspects the file bytes.
| Response field | What your workflow should check |
|---|---|
result.width and result.height |
Dimensions match the downloaded, oriented result |
result.content_type |
Output format matches the requested delivery format |
result.bytes |
Size is suitable for the destination |
stats.target_not_met, when present |
A requested byte target was not reached |
The current input ceiling is the smaller of your account's file allowance and 50 MiB per image. Documented and tested input formats include JPEG, PNG, WebP and HEIC. Check the image parameter reference before building an uploader that accepts a broader list.
Keep resize policy and byte targets separate
Resizing controls pixel dimensions; encoding quality controls another part of the size-versus-detail tradeoff. If the file still exceeds a byte target, decide whether lowering quality, reducing dimensions or keeping a larger output is acceptable. A valid request does not guarantee that every target is reachable.
The service can accept max_bytes to search for a smaller encoded result, but it can report target_not_met. Handle that outcome explicitly. Do not keep retrying the same image with an unchanged policy and expect a different result.
Sharp's output documentation distinguishes format and metadata options. For this service, baseline JPEG is the default. When your destination is the project's PDF pipeline, keep that default and verify the generated report in your actual readers. The advice is an integration choice; it should not be turned into a claim that all PDF implementations universally reject progressive JPEG.
If you are compressing the finished report too, avoid repeated lossy conversions in intermediate steps. Test a workflow that keeps an original and makes one delivery image, then compare it with the complete PDF compression workflow.
Design batches around partial failure
A batch should preserve the identity of each input and process successful results even when another image fails. Use a stable ref for each source, store the outcome against that reference, and retry only the failed work after understanding its error. Do not infer success from the batch request alone.
Use POST /v1/image/batch for batches of up to 250 images, subject to account limits. Its response reports individual outcomes. A failed HEIC decode or an unreachable source should not make you throw away every successful output. The error catalogue helps distinguish unsupported media, retrieval failures and invalid options.
For an application test, deliberately add one invalid file to an otherwise valid set. Confirm that your UI reports the failed item and still associates all successful outputs with the right source records. Check billing against the success rules in pricing; never calculate the final batch fee simply from how many files were submitted.
An acceptance checklist for phone photos
Use a test set that exposes the decisions the workflow makes. These are proposed checks, not a report of a live account test:
- A portrait HEIC remains upright and its reported dimensions match the download.
- A mirrored or rotated JPEG is displayed correctly after metadata removal.
- A wide colour image produces an acceptable sRGB delivery copy.
- A PNG requiring transparency is not accidentally forced into an unsuitable format.
- A small source image is not enlarged just because the request specifies a maximum width.
- An invalid file is marked failed without misassigning the remaining results.
- A repeated logical operation uses the same idempotency key.
- The downstream gallery or report opens the file correctly.
Should I keep the camera original?
Keep it when your archive, evidence process or future outputs require it. A stripped, resized delivery copy serves a different purpose. Make retention an explicit decision instead of assuming the compressed image replaces the source for every use case.
Does removing EXIF make an image anonymous?
No. It removes certain metadata from that copy; visible personal information can still remain. Evaluate the pixels and your handling process separately.
Can I use one quality value for all images?
You can use one as an initial policy, but check representative content. A photograph containing fine text may fail your acceptance check while a simple scene looks fine at the same setting. Let the destination and the evidence set determine the final policy.